Products Mentioned In This Article – Click the links to view which products we recommend on Amazon.
- Pre-scented air freshener beads – For people who don’t want the hassle of making your own beads, you can buy pre-scented beads.
- Unscented, uncolored water beads – Used for making your own scented beads. This is a fun craft idea, but takes more work.
- Unscented, colored water beads – The same as above, but they already have colors in them, so you don’t have to mess with candle dye to color them yourself.
- Metal cookie cutter shapes – Used for melting scented beads into cute decorations.
- Candle dye – Used for coloring your unscented, uncolored water beads from above.
- Colored ribbon – For hanging up your self-made craft decorations. If you don’t have any already,
- Scented oil – For adding a scent of your choice to the beads.
Have you heard of air freshener beads? They’re also known as aroma beads, or “water bead diffusers” (meaning they diffuse, or spread out, an aroma).
Air freshener beads are small, marble-sized plastic beads that absorb scented oils or cleaning product, then give off that scent for a prolonged period of time. Their effect is similar to a regular plug-in air freshener or bowl of scented spices.
Aroma beads look almost exactly like bath bombs – the scented balls that you put into a bathtub. But they are not! Don’t make the mistake of putting air freshener beads into your bathtub, because they won’t disintegrate into the water. In fact, they would absorb the water instead.
These air freshening beads are made by using an object called “water beads” to absorb scented oils instead of just regular water. However, the key difference between an air freshener bead, versus a regular water bead, is that the air freshener bead is scented whereas the regular water bead is not. Be sure you don’t accidentally make unscented water beads when you’re really trying to make scented aroma beads instead. Regular water beads won’t smell like anything – they’re just there to look pretty.
Air freshener beads are a great tool for decorating your house while also making it smell great. The reason people love them is because they look so cute, and also allow you some freedom in how you decorate.
Let’s take a look at an example decoration that’s made from scented air freshener beads:
Example Air Freshener Bead Display (also known as Aroma Beads)
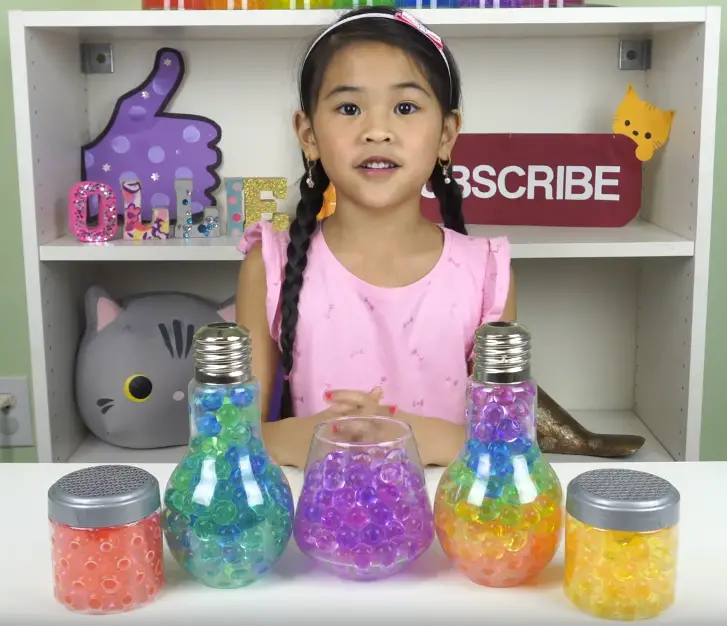
Looks pretty awesome, right!?
That’s what I thought.
How To Use Air Freshener Beads Properly
- Buy pre-scented air freshener beads.
- Put them where you want the scent, such as in a vase on your coffee table.
- You’re done!
Okay, that much seems obvious. But what if you want to make your own? We have a guide for that too.
How To Make Your Own Scented Beads
- Buy empty water beads that have no scent.
- Buy a scented oil or chemical of your choice.
- Get a jar, vase, or other container for the beads.
- Put a small number of beads into the container and pour a lot of water on top.
- Let the beads soak over night or all day. They will absorb the water and expand greatly in size.
- If there is excess water in the container after soaking the beads overnight, you can drain it.
- Now add the scented oil of your choice. Any scent you like will do. The beads will absorb the scented oil and then give off a pleasant aroma for an extended period of time (days to weeks).
- Display the scented water beads in your container, or put an individual bead anywhere you want the scent to be.
Aroma Bead Tips, Tricks, and Ideas
There’s a few great tips you can use to make your house look and smell great with these scented water beads.
Here’s a few awesome things you can do with them:
- You can add flower-scented beads to the bottom of a vase of flowers, giving the impression that your flowers smell even better than they really do. Your guests will never know the truth!
- You can put an air fresher bead into a cabinet, a drawer, a locker, or any place you want to smell better. Just be sure you don’t put it somewhere that gets too hot, or the bead could melt.
- You can suck an aroma bead up with your vacuum cleaner, to make the vacuum bag smell better. This is a great idea if your vacuum smells foul because you had to suck up a lot of smelly cat litter or something like that.
- You can combine different beads with different scents to make your own custom scent, such as cinnamon and vanilla. If you want the scent to be slightly different, just add or remove a few beads of the desired scent until it smells perfect.
- You can also produce your own custom scent by combining the scented oils in the same jar while you are soaking the beads to create them to begin with.
- When your beads start to lose their scent, you can extend the lifetime of them by adding some more water to the bead container. This water will be absorbed by the beads and help them emanate the remaining scented oil within them. You can do this a few times until all the scented oil is used up. If you add water and the scent doesn’t come back, you can add more scented oil instead and the scent should come back.
- Aroma beads are a great decoration and a jar of them can make a super cute gift to your lady friends. You can even tell them that you made a custom scent just for them by combining multiple flavors of scented beads into one jar.
- Small jars of scented beads can make a cool party favor.
Air Freshener Beads + Cookie Cutter + Oven = Awesome Smelly Decorations
Some people take their decorations a step further than just displaying the aroma beads in a jar or vase. They melt the beads down and make their own custom-shaped decorations instead!
It sounds weird at first. But once you see them in action, it actually sounds like a great arts and crafts idea that produces some very fun little scented trinkets for you to hang up.
Let’s take a look at some example decoration that you can make by melting down your aroma beads and shaping them how you want:
Example Decorations You Can Make By Melting Scented Air Freshener Beads Into A Cookie Cutter Shape:

These look awesome! Don’t they?
Here’s the basic instructions for how to make your own cookie-cutter scented decorations:
How To Make Your Own Scented Cookie-Cutter Decorations
You can make your own scented bead cookie cutter decorations by following this guide.
The primary difference between making normal scented air freshener beads, and making a cookie cutter decoration, is that we won’t be adding water to the beads in this cookie cutter process.
That’s because we want the beads to only the scented absorb oil, not water, so that they can melt in the oven into our desired shape. If they have absorbed water, they won’t do so well in the oven!
You Will Need:
- Unscented air freshener beads.
- Colored candle dye, for coloring the beads.
- Scented oils to add a fragrance to the beads.
- A measuring cup.
- A sealable container, such as a mason jar, for holding the beads. You will need to shake the jar to soak the beads in the scented oil, so make sure it seals tight.
- A metal cookie cutter, in any shape you want. Or multiple cookie cutters, for making multiple shapes.
- A baking sheet for melting your plastic beads in the oven.
- An oven.
- A thick screw with a flat top. This is for making the hole in your decoration so that you can hang it up.
Once you have the materials required, here’s the steps for making your own scented bead decorations.
Steps To Follow:
- Measure one to one and a half cups of unscented beads. Pour them into your mason jar or container.
- Add only a few drops of colored candle dye to the container. Be careful – the candle dye will stain your hands and clothes easily.
- Measure two tablespoons of scented oil. Add it to the container.
- Seal the container and shake it thoroughly. The colored dye and scented oil will spread over the beads evenly while shaking.
- Let the beads sit for at least 24 hours, until the oil has thoroughly soaked into them and they are completely dry.
- Pre-heat your oven to 350F and get your baking sheet and cookie cutter ready.
- Place the cookie cutter shape of your choice onto the baking sheet. Place the flat top screw in the location that you want the hole to appear. This is for stringing your decoration up to hang somewhere. If you just want a decoration to use as a coaster or something to sit on your coffee table, then you don’t need to make this hole.
- Fill the cookie cutter about 3/4 of the way full with your scented beads.
- Make sure your oven is fully pre-heated. Put the baking sheet with your decorations into the oven for about 5-7 minutes. That’s all.
- Remove the baking sheet from the oven and let it cool for 10 minutes.
- Pop the decoration out of the cookie cutter, and take the screw out of the decoration.
- If your decoration has plastic that sticks out in unwanted locations, you can trim the plastic with a strong pair of scissors.
- Put a string through the hole and hang up your cute decoration. You’re done!
At step #8, before going into the oven, your decoration should look like this:
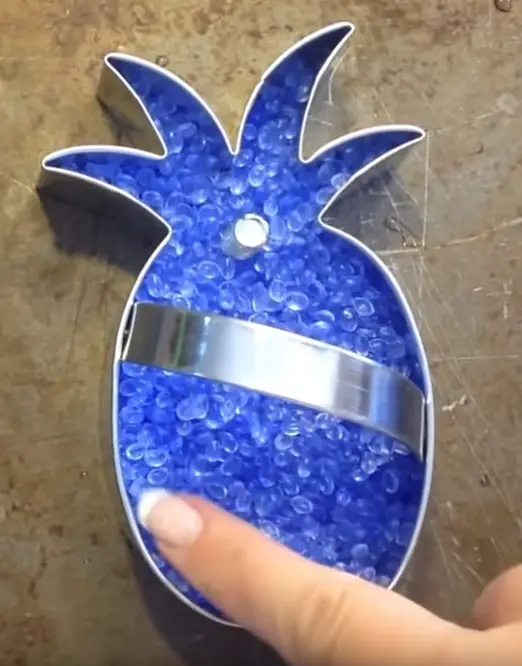
Sitting on a cookie sheet and ready to be melted in the oven.
Source: How To Make Aroma Bead Car Scent Air Fresheners Video
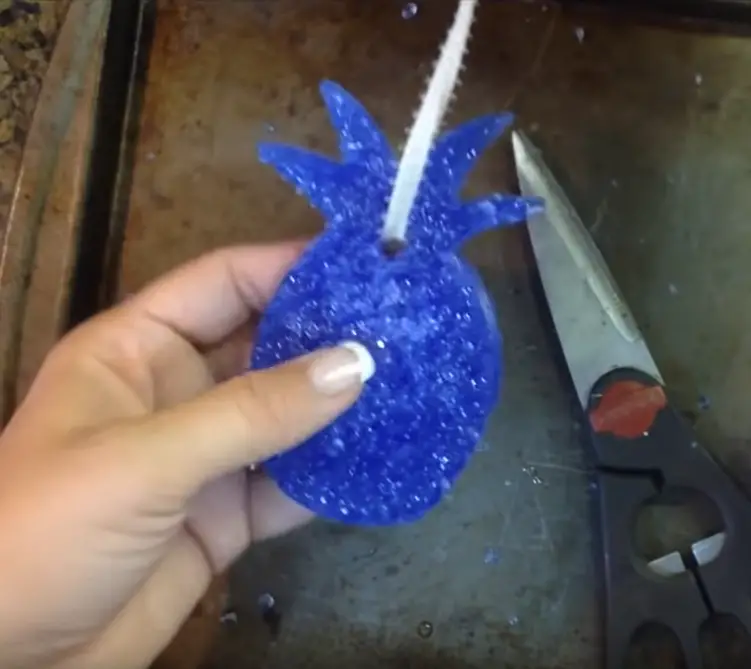
At step #12, after cooling off out of the oven, you may want to remove poky parts of your decoration with scissors:

Source: How To Make Aroma Bead Car Scent Air Fresheners Video
After you finish trimming and stringing up your decoration, you’re done!
Cleaning up the cookie sheet should be easy because the plastic typically won’t stick to it unless you burn it by leaving it in the oven too long.
What do you think? Isn’t it cool what you can do with your own air freshener beads?